Adding Popover Images to Publications
This tutorial reviews the steps in adding a popover image to your publications using the FlowPaper desktop publisherWhat is a popover image?
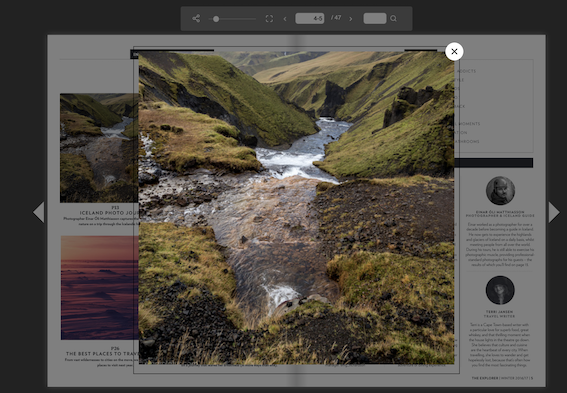
A popover image is an image that appears in a larger size (typically fills the screen) when you click a smaller version of the image (or an icon, or a different image)
Here's how to add it.
If you haven’t already imported the publication you wish to publish, do this now by opening the publisher and clicking on the import button. The popover feature is available in Zine and Elements templates, so select either one of those options. Select your PDF and click import.

To add a popover image, go to the page where you wish to add the image. When you are on the right page, go into edit mode by either double-clicking the page or using the edit mode button in the top right-hand menu.
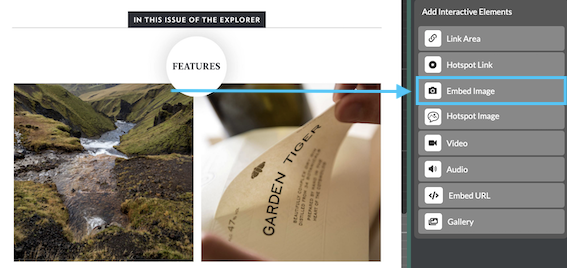
Then select the ‘Embed Image’ option which you will find in the edit options menu on the right-hand side of the publisher. Click the “Browse” button next to the “Path: enter line. Now browse your computer for the image you wish to add. Click ok and the image link will be visible. Next, activate the tick box at the bottom of the window. It's called ‘Display the image in a popover.’ And then click the browse button next to it to select the exact image you just added. This step enables the viewer to see the images in a larger format. Click ok once you have added the link.

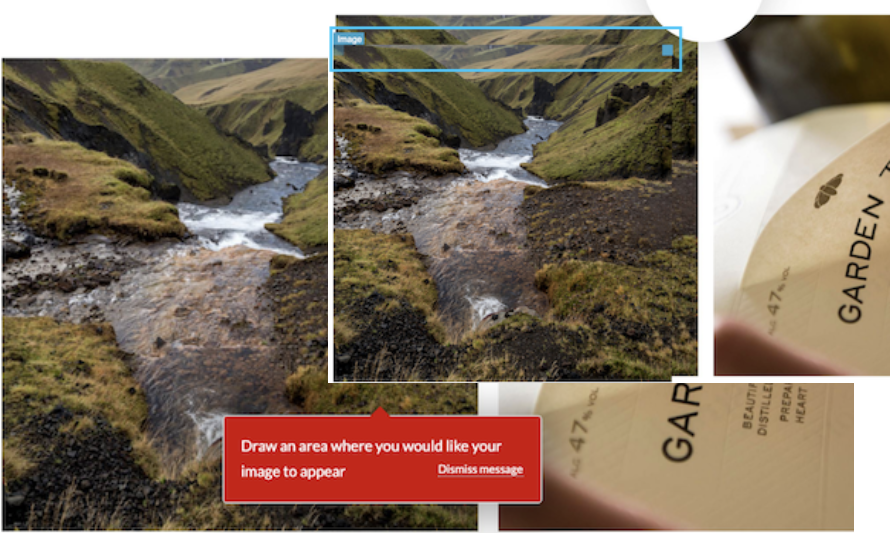
The pop-up will close and you will have a draw cursor to choose where you wish to place your image. You can adjust this later if you are not happy with the placement.

To view the image, exit the edit mode and enter design mode. Browse to the page where you added the image and click it. Now you will see your popover image.
If you wish to see it in the browser, select publish and click view in browser once FlowPaper has finished uploading your publication to the FlowPaper cloud hosting.
You can create a pop over image anywhere in your publication, it does not have to be the same image. Now go on try it.